How to Change BPM and Tempo in a DAW: Time-Stretching Guide
Learn how to change BPM and tempo in your DAW: setting and tapping tempo, how time-stretching works, and the steps in Ableton, Logic Pro, FL Studio and Cubase.
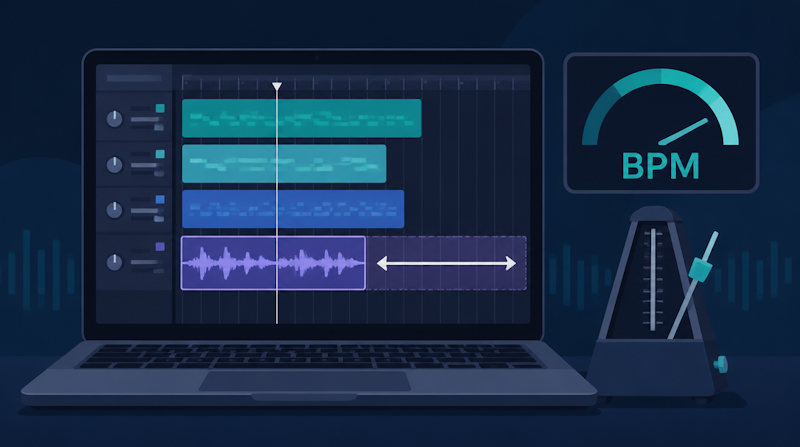
Change the BPM in your DAW and one of two things happens: everything follows along perfectly, or your audio drifts off the grid and starts to sound smeared. Knowing how to change tempo and BPM properly comes down to one distinction — whether you are simply typing in a new number, or whether your audio needs time-stretching to follow it. This guide covers BPM basics, how to change tempo in Ableton Live, Logic Pro, FL Studio and Cubase, how to build tempo changes inside a song, and how to keep your audio sounding clean, all based on each manufacturer's official documentation.
BPM and Tempo Basics: What "Changing the Tempo" Means in a DAW
BPM means beats per minute
BPM (beats per minute) is the unit used to express tempo: how many beats occur in one minute. As the Wikipedia article on tempo explains, 60 BPM means one beat per second, and 120 BPM is twice that speed. The higher the number, the faster the music feels.
You may also see tempo written in sheet music as "M.M. = 60". M.M. stands for Mälzel's Metronome, after Johann Nepomuk Maelzel, whose metronome popularised precise tempo marking in the early 19th century. M.M. = 60 is simply 60 BPM. The number in your DAW's tempo field is exactly this value.
Project tempo vs. the original tempo of your material
Tempo gets much less confusing once you separate two different numbers:
- Project (song) tempo: the tempo that drives your bar lines, grid and metronome — the number in the tempo field
- Source tempo: the speed at which an imported loop or a recorded performance was originally played
When the two match, your material sits neatly on the grid. When they don't, you have a choice: stretch the material to fit the project, or change the project tempo to fit the material. Every DAW feature covered later in this guide is essentially a way of automating that choice.
MIDI and audio respond differently
What happens when you change the tempo depends on the type of track.
Material | When the tempo changes | Effect on sound quality |
|---|---|---|
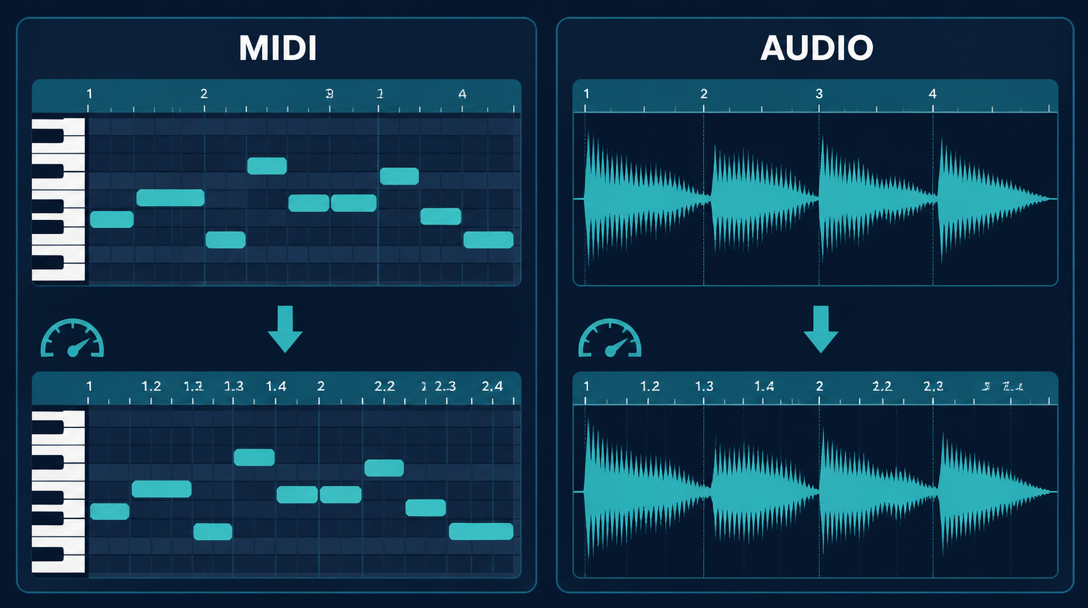
MIDI (performance data for virtual instruments) | Note positions and lengths simply play back at the new tempo | Essentially none — the sound is generated fresh each time |
Audio (recordings, loops, samples) | Plays at its original speed unless processed; following the tempo requires time-stretching | Artefacts depending on the algorithm and the amount of change |
MIDI is a set of instructions — which note to play and when — so changing the tempo never degrades it (see our guide to MIDI basics for how this works). Audio, on the other hand, is the waveform itself, so changing its speed means processing that waveform. Almost every tempo headache you will run into is an audio problem.
How to Change BPM: Setting Your Project Tempo
Type a value into the tempo field
The most basic way to change BPM is to edit the tempo field at the top of your DAW, either by typing a value or by dragging up and down. According to the Ableton Live 12 Reference Manual, for example, the Control Bar's tempo field shows both a coarse tempo in BPM and a fine tempo in hundredths of a BPM, and each can be adjusted or mapped separately.
Before you start producing, it pays to decide three things:
- The basic tempo (BPM) of the song
- The time signature (4/4, 3/4, 6/8 and so on)
- Whether the tempo will change during the song
Making big tempo changes after you have recorded audio or programmed MIDI forces you to rework your audio tracks. The earlier you settle the direction, the smoother the rest of the session will be.
Measure BPM with tap tempo
When you don't know the BPM of a song or phrase, tap tempo is the quickest fix. Tap a button or key on each beat, and the DAW calculates the BPM from the spacing between taps. The Ableton manual notes that Live responds immediately but becomes more accurate the more you tap, and that the function can be mapped to a computer key or a MIDI footswitch.
- The first few taps tend to wobble, so tap at least eight times
- Round the result to a whole-number BPM
- Slow songs are sometimes detected at double tempo and fast songs at half tempo — check that the number matches how the music feels
Auto-detect the tempo of your audio
Most DAWs can analyse the tempo of imported audio. The FL Studio manual explains that right-clicking a sample's TIME knob and choosing "Autodetect" analyses its tempo (BPM). Logic Pro's Smart Tempo and Cubase's Auto Adjust serve the same purpose. Detection works best on material with a clear rhythm; loosely played live performances and material without clear downbeats are more likely to be misread.
How Audio BPM Changes Work: What Is Time-Stretching?
Resampling: speed and pitch change together
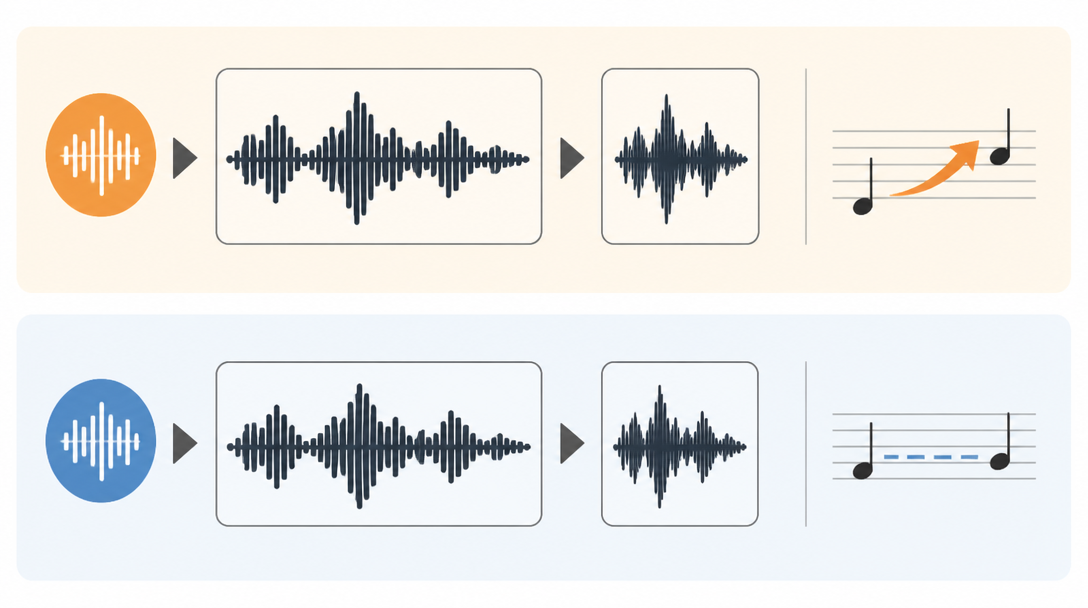
The simplest way to change the tempo of audio is to change its playback speed. Speed it up and the pitch rises; slow it down and the pitch drops — exactly like changing the speed of a record. Ableton Live calls this Re-Pitch mode, and its manual describes it as working the way a DJ changes the speed of a turntable, with pitch following tempo. In FL Studio, the equivalent is "Resample".
Because the pitch changes, this isn't what you want for most production work. But since the waveform isn't chopped up, the tone stays natural, and it can be used deliberately as an effect — speeding up a drum loop so its pitch character shifts along with it, for instance.
Time-stretching: change length, keep pitch
Time-stretching changes the length (and therefore the tempo) of audio without changing its pitch. By splitting the sound into tiny grains and rearranging them, or by analysing and rebuilding its frequency content, the algorithm separates speed from pitch. When your audio follows a BPM change automatically, this is the process running in the background.
Every algorithm has material it handles well and material it struggles with. Drums, where the attack (the start of each hit) matters most, need very different treatment from vocals, where pitch is everything.
Choosing the right algorithm for your material
Here is how the recommended uses in each DAW's official documentation line up by type of material:
Material | Ableton Live (Warp Mode) | Logic Pro (Flex Mode) | FL Studio (Stretch Mode) |
|---|---|---|---|
Drums and percussion | Beats | Slicing | Slice stretch / Slice map |
Vocals, solo instruments, bass | Tones | Monophonic | e3 Mono (offline) |
Rhythm guitar, keyboard comping | Complex, etc. | Rhythmic | Stretch |
Chords and full mixes | Complex / Complex Pro | Polyphonic | Stretch pro / e3 Generic |
Change pitch with speed (effect) | Re-Pitch | Speed (FX) | Resample |
Sources: Ableton Live 12 Reference Manual, "Audio Clips, Tempo, and Warping"; Logic Pro User Guide, "Flex Time algorithms and parameters"; FL Studio Manual, "Sampler Channel Settings". The table maps recommended uses; modes in the same row are not the same algorithm.
Apple's guide describes Polyphonic as the most processor-intensive of all the Flex algorithms, and Ableton describes Complex Pro as a variation of Complex that may offer higher-quality results. Higher-quality modes cost more CPU, so a practical approach is to work in a lighter mode and switch to the high-quality mode for final checks.
How to Change Tempo in Each DAW: Ableton, Logic, FL Studio and Cubase
Ableton Live: warping audio to follow the tempo
In Ableton Live, turning on Warp for an audio clip makes the clip stretch and squeeze to follow the Set's tempo. Warp settings, including the Warp Mode, live in the Clip View.
- Long samples are warped automatically when "Auto-Warp Long Samples" is enabled, which it is by default
- Where timing drifts, Warp Markers lock a specific point in the sample to a beat on the timeline (double-click in the upper half of the Sample Editor, or press Ctrl+I / Cmd+I)
- The Live 12 manual also describes setting a clip to Lead, so that the Set plays back at the tempo determined by that clip's Warp Markers
Switch Warp off and the clip plays at its original speed. If audio sounds wrong after a tempo change, checking whether Warp is on — and which Warp Mode is selected — is the fastest first step.
Logic Pro: Smart Tempo and Flex Time
In Logic Pro, Smart Tempo is the centre of tempo matching. According to Apple Support, you can record without the metronome and let Logic analyse the recording to build a tempo map. There are three Project Tempo modes:
Mode | What it does | Best for |
|---|---|---|
KEEP | Keeps the project tempo and conforms new recordings and imported material to it | Adding material to a song whose tempo is already set |
ADAPT | Changes the project tempo to follow new recordings or imports | Building a song around a performance played without a click |
AUTO | Chooses between Keep and Adapt automatically | Letting Logic decide |
For audio regions to follow project tempo changes, Flex needs to be enabled on their track. Sound On Sound's guide to Smart Tempo (November 2025) adds that Smart Tempo's stretching is built on the Flex Time algorithms, that analysis needs material with a discernible rhythm, and that beat markers can be corrected in the Smart Tempo Editor when the analysis gets it wrong.
FL Studio: Fit to tempo and Stretch modes
In FL Studio, choosing "Fit to tempo" from an audio clip's menu and selecting "(project)" locks the sample to the project tempo, so it is stretched automatically whenever the tempo changes. The main settings in the official manual are:
- TIME knob: sets how long the sample takes to play. Right-click for "Autodetect" (tempo analysis) or "Project tempo" (lock to the project tempo)
- Resample: standard pitch shifting in which length changes together with pitch
- Stretch / Stretch pro: real-time modes that keep vocals and rhythmic samples in key and in time as the project tempo is automated; Stretch pro adds formant control (the resonances that shape the character of a voice)
- e3 Generic / e3 Mono: offline Elastique algorithms; e3 Mono is specialised for vocals and solo instruments
FL Studio's Edison editor also includes a Time Stretch / Pitch Shift tool that changes duration, pitch and formant independently. For the beat-making workflow itself, see our FL Studio step sequencer guide. MusicTech's FL Studio time-stretching tutorial also walks through tempo detection and Fit to tempo.
Cubase: matching the project tempo with Musical Mode
Cubase gathers its tempo-matching tools in the Sample Editor and the lower zone editor. Steinberg's Cubase Pro 12 documentation lists five:
- Stretch to Project Tempo: stretches the selected event to match the project tempo
- Musical Mode: applies real-time time-stretching to audio clips so that they match the project tempo
- Auto Adjust: analyses the audio to create a grid, which Musical Mode can then match to the project
- Manual Adjust: lets you correct the grid and tempo by hand
- Free Warp: changes the timing of individual positions in your audio
If you are still choosing a DAW, our DAW comparison guide covers the strengths of the major options.
Changing Tempo Mid-Song: Tempo Changes and Automation
Use a tempo track or tempo automation
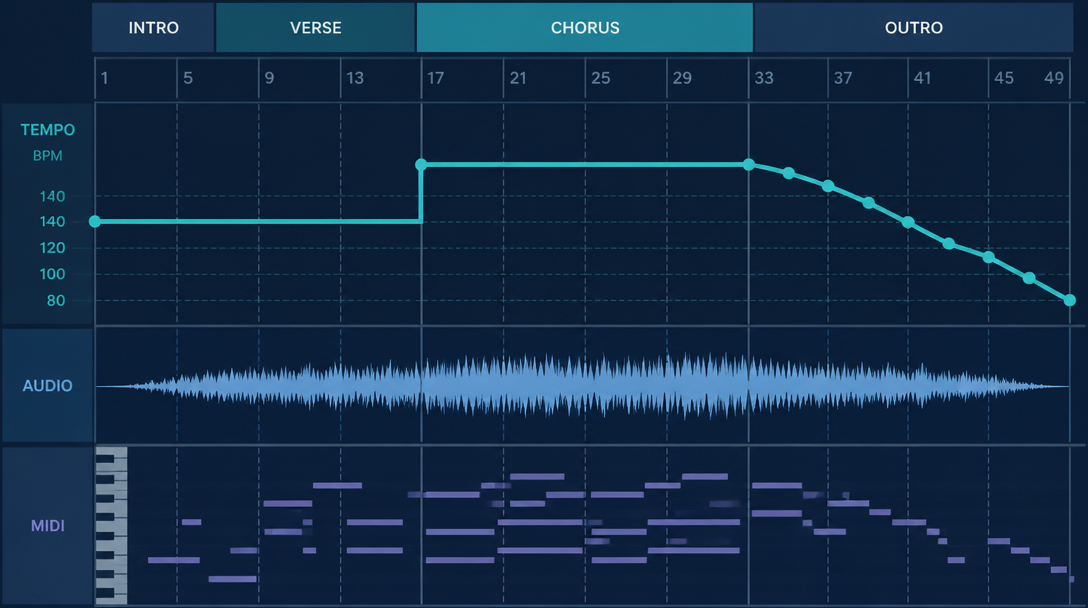
Pushing the tempo up for a chorus or slowing down at the end (a ritardando) is done with tempo automation. Logic Pro has a dedicated tempo track, which also displays the tempo changes created by Smart Tempo. In Ableton Live, the song tempo can likewise be automated.
Tempo changes come in two basic shapes:
- Stepped changes: switch BPM at the start of a bar — useful for giving each section its own feel
- Gradual changes: move the BPM a little at a time over several bars — the way to create a ritardando or accelerando
What to check before automating tempo
When the tempo moves mid-song, everything synced to it moves too:
- Tempo-synced delays and LFOs (effects that pulse with the beat) change their timing with the tempo
- Audio with Warp or Flex switched off won't follow, and drifts from the point where the tempo changes
- The bigger the tempo change, the more audible time-stretching artefacts become on loops
For volume movement locked to the beat, see how to use sidechain compression.
Fitting the tempo to a performance recorded without a click
If you want to keep the natural push and pull of a live performance, you can build the tempo map around the recording instead. Logic Pro's ADAPT mode and free tempo recording do this, as do Ableton Live's Warp Markers and Lead setting. The advantage is that the performance keeps its feel, while programmed drums and synced effects can still lock to the tempo afterwards.
Keeping Audio Clean When You Change BPM: Time-Stretching Tips
Keep the amount of change small
Time-stretching is powerful but not magic. Sound On Sound's article on timing correction points out that whenever you process audio there will be at least some undesirable artefacts, so "less is more", and that extreme moves such as doubling a loop's length cause severe degradation.
- Build your project at a BPM close to the original tempo of your material
- If you need a large change, consider choosing different material or re-recording
- See whether the material works at half or double time (a 140 BPM loop in a 70 BPM song, for example)
Pick a mode per track and check by ear
Within the same song, drums, bass and vocals each need different processing. Set the mode track by track, and after any tempo change, solo each track and listen. Things to listen for:
- Drum attacks that sound blurred or doubled
- Vocals or bass with wavering pitch or an unnatural vocal character
- Sustained notes picking up a vibrato-like wobble or a metallic ring
On vocals, stacking a tempo change on top of pitch correction makes artefacts pile up, so isolate which process is causing a problem before you fix it.
Render with high-quality processing and keep the originals
Real-time time-stretching is often tuned for speed while you work. The Sound On Sound article mentioned above notes that Cubase's real-time algorithms are lower quality than its offline ones, and recommends committing ("flattening") warped audio with high-quality offline processing before mixing down.
- Once tempo and stretch settings are final, render the audio using a high-quality mode
- Keep the original files under a different name so you can go back
- Move on to mixing and mastering with the rendered audio
Our mixdown guide covers the next step. For examples of finished tracks that went from tempo planning to final master, you can listen to Daito's releases on TuneCore Japan.
Summary
How you change BPM and tempo depends on whether your material is MIDI or audio. The key points:
- BPM is the number of beats per minute. Changing the tempo field is the basic method; use tap tempo or auto-detection when you don't know the value
- MIDI never degrades with tempo changes, but audio needs time-stretching (or resampling)
- Ableton Live uses Warp, Logic Pro uses Smart Tempo plus Flex, FL Studio uses Fit to tempo plus Stretch modes, and Cubase uses Musical Mode to make audio follow the tempo
- Choose the algorithm that suits the material: drums, vocals or full mixes
- Keep changes small, render final audio with high-quality processing, and keep your originals
To hear tracks built with tempo in mind, check out Daito's music.