How to Write a Bassline: Root Notes, Chord Tones & Groove
A beginner's guide to writing basslines: anchor root notes to your chords, add movement with chord tones and passing notes, and lock the groove to your kick.
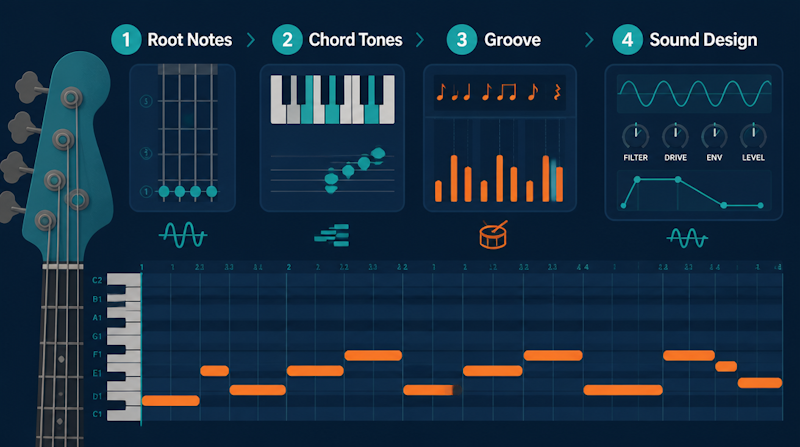
Many producers hit the same wall early on: they know how to hold a root note under each chord, but the bass just sits there and never grooves. A bassline is the low-pitched foundation of a track, and its power comes from doing two jobs at once — defining the harmony and driving the rhythm . This guide walks through how to write a bassline step by step: anchoring root notes to your chords, adding movement with chord tones and passing notes, locking the groove to your kick, layering sub and main bass, and mixing the low end so it translates everywhere.
Bassline Basics: Its Role and the Big Picture
Before choosing notes, it helps to understand what the bass actually does in a track. Once the role is clear, every note choice has a reason behind it.
What a bassline is
A bassline (or bass line) is the low-pitched instrumental part used across blues, jazz, funk, electronic and classical music (Wikipedia: Bassline). Played on electric bass, double bass or synth bass, it sets the center of gravity for the whole arrangement. When the low end is solid, the melody and chords above it feel grounded.
Two jobs: harmony and rhythm
Unlike other voices, the bass plays a special role in supporting and defining harmonic motion (Wikipedia: Bassline). At the same time, it acts as the rhythmic bridge between the drums and the melodic parts above. In other words, a single line has to tell the listener which chord is playing and set the feel of the groove simultaneously. If you want to review how chord progressions work first, see our guide to music theory basics (scales, keys and diatonic chords).
The workflow in four steps
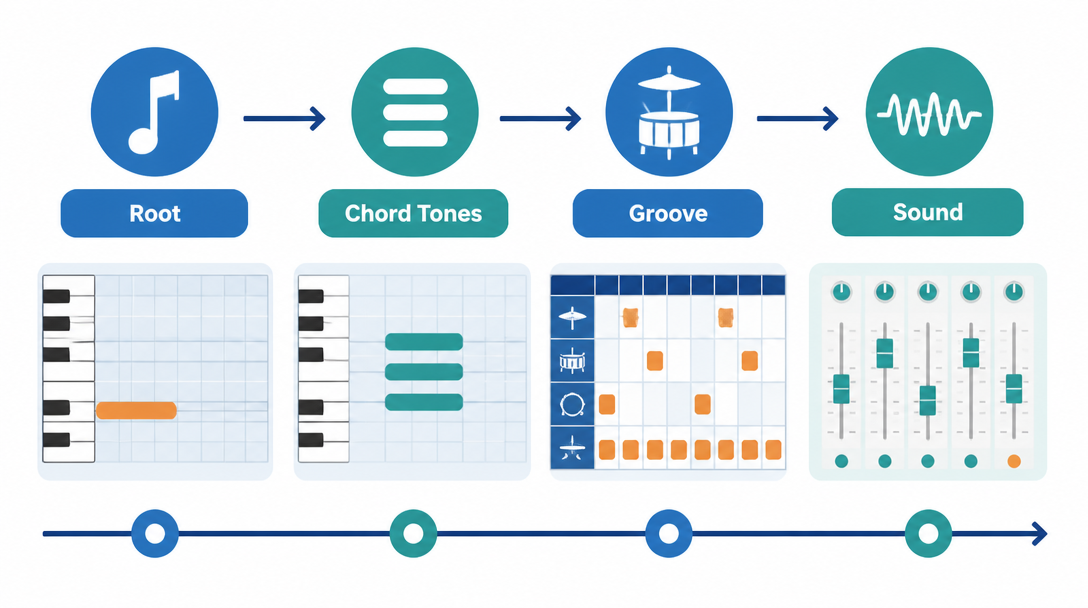
This article breaks bassline writing into four steps — lay the foundation first, then add movement and character on top.
- Step 1: Anchor root notes to your chords (foundation)
- Step 2: Add movement with chord tones and passing notes (melody)
- Step 3: Lock the groove to your kick (feel)
- Step 4: Layer sub and main bass to shape the sound (tone)
Step 1: Anchor Root Notes to Your Chords
The starting point of any bassline is placing root notes that follow the chord progression . Get this right and the track already works.
Why root notes come first
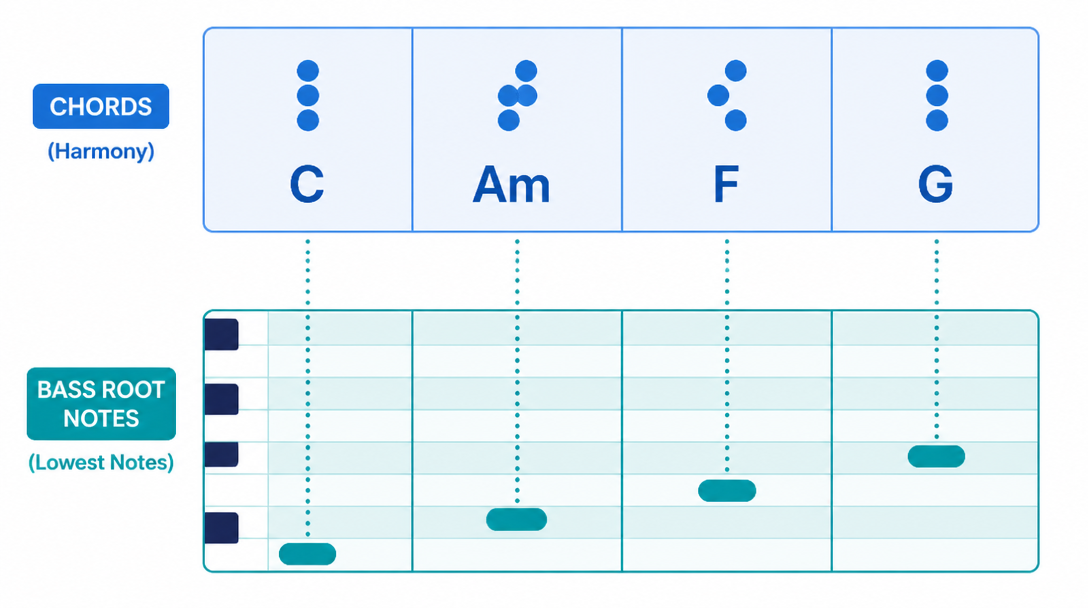
A root note is the central note a chord is built on. When learning bass, building lines around root notes should be every player's starting point (StudyBass: Roots to Chords). Playing the root of each chord at the moment the chord changes — usually on beat 1 of the bar — makes the progression instantly clear to the listener.
Hit the root on each chord change
For a progression like C – Am – F – G, simply playing C, A, F and G at the top of each bar is the simplest possible bassline, and it already communicates the song's skeleton. In a DAW, program this "root only" line in MIDI first and check it against the chords by ear. Turning that skeleton into a full arrangement is covered in our guide to arranging.
Root note vs. bass note
Here is a useful nuance: the bass note (lowest note played) and the root note are not always the same. When a chord tone other than the root is in the bass, the chord is inverted; when the lowest note is not even part of the chord, you get a slash chord (Wikipedia: Bass note). For example, "C/E" means a C chord with E in the bass. Choosing a moving bass note lets you create smooth motion even when the chord stays the same.
Step 2: Add Movement with Chord Tones and Passing Notes
Once root playing feels comfortable, add movement and character. The keys are chord tones and passing notes.
The order of chord tones: root, fifth, third, seventh
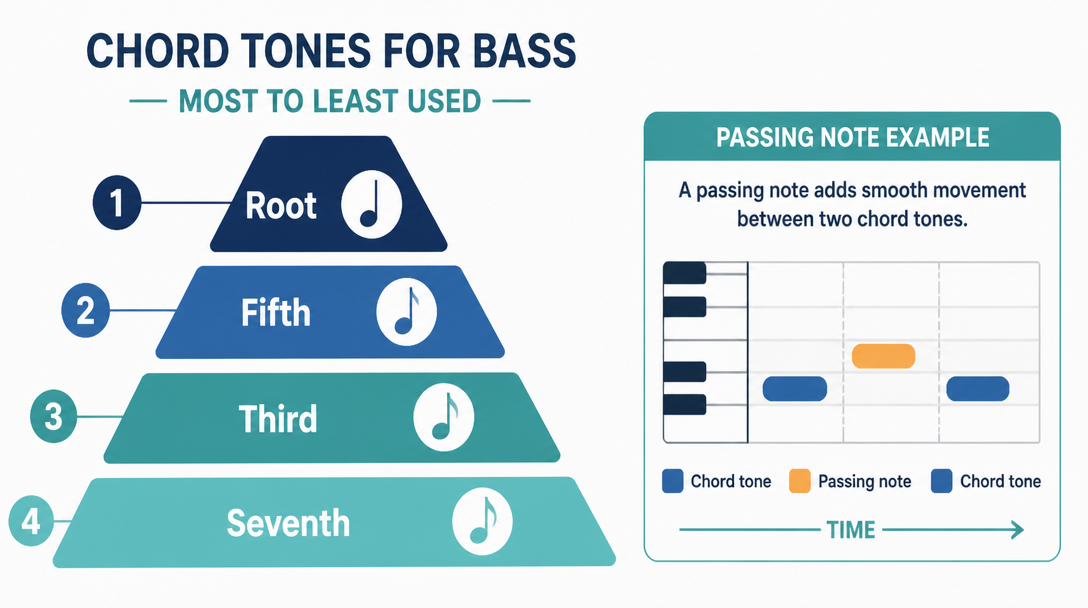
Chord tones follow a natural order of usage: the root is most common, then the fifth, then the third, then the seventh, then other tones. The root and fifth in particular are the most supportive-sounding notes a bassist can play beneath a chord (StudyBass: Roots and Fifths).
The root-and-fifth pattern
Alternating root and fifth is a staple pattern used everywhere from classical to metal, country and polka (StudyBass). It works over major, minor and power chords alike, so it's a great first move. Landing on the root and swinging up to the fifth already makes a line feel far more alive than static root playing.
Connect with passing notes
Passing notes fill the space between chord tones. Moving from one chord tone to the next, you drop in a scale tone as a "stepping stone" — for example, passing through D on the way from C to E. Learn the root, third and fifth as the backbone of the chord, then slot in approach notes to give the line melodic interest (MusicRadar: Write basslines around root notes).
Walking bass
A walking bass that moves in steady quarter notes is a classic device in Baroque, jazz, blues and rockabilly (Wikipedia: Bassline). It combines scale tones, arpeggios and chromatic runs to trace the outline of the progression — essentially an advanced application of chord tones and passing notes. Much of the thinking overlaps with writing melodies, covered in our guide to writing melodies.
Step 3: Lock the Groove to Your Kick
When you play matters as much as what you play. A bassline lives or dies by how it meshes with the drums.
The drum relationship is everything
The key to an effective bassline is figuring out how it works with the drum rhythm — above all, the kick (Wikipedia: Bassline). Line the bass up with the kick and the low end feels unified; deliberately offset it and syncopation creates forward drive. Find the kick pattern first, then decide on purpose where to double it and where to leave gaps.
Use the gaps
Beginners tend to cram in notes, but in a bassline the silence between notes can be its most powerful asset (Loopcloud: Ultimate Basslines). Leaving space lets the kick step forward and gives the groove room to breathe. Playing the bass slightly behind the beat also gives the percussion its own space and creates a low, settled feel.
Riffs, grooves and variation
Basslines in popular music are built from simple, catchy phrases (riffs or grooves) repeated with variation throughout the song (Wikipedia: Bassline). Write a core two-bar phrase, then add, remove or octave-shift notes in the sections to keep things moving without boring the listener.
Step 4: Layer Sub and Main Bass to Shape the Sound
With notes and rhythm set, design the actual tone of the bass. For synth bass especially, splitting the sub and mid ranges is standard practice.
Split into two layers
Splitting the bass into a main channel and a sub channel is a reliable way to keep the low end stable (Loopcloud). Use a sine or triangle wave for the sub to cover the lowest frequencies, and high-pass the main bass so it carries the character in the low-mids. That way you can control weight and tone independently.
Add harmonics so it translates on small speakers
Phone and laptop speakers simply cannot reproduce deep sub frequencies. Adding upper harmonics with saturation lets the brain fill in the missing fundamental so the bass is still perceived on tiny speakers (iZotope: How to mix bass). Think of it as "translating" a sub that would otherwise disappear. Synth sound design basics are covered in our article on subtractive synthesis.
Release your finished track
Once a track with your bassline is done, distributing it and letting people hear it is one of the fastest ways to improve. You can hear finished examples on Daito's distributed releases. Listening back objectively reveals how well the bass and kick lock together and where the mix needs work.
Mixing the Bass: Coexisting with the Kick
A bassline only sounds the way you intend once it's mixed. The biggest challenge is resolving the low-end tug-of-war with the kick.
Keep the low end in mono
Big low frequencies don't need stereo width. Keeping the lowest end in mono (centered) prevents phase cancellation and keeps a solid core in the middle of the mix (Mixed In Key: Mixing Low End Like a Pro). Let mid and high elements provide the width, and gather the bass in the center.
Carve space with sidechain or EQ
Kick and bass fight over the same 60–150 Hz region, and left unchecked the low end turns muddy and loses definition. The fixes: route the kick into the bass compressor so the bass ducks briefly when the kick hits (sidechain), or use a dynamic EQ to dip only the overlapping band (iZotope). Detailed settings are in our guide to sidechain compression.
Watch the mud-prone bands
Low-end mud collects not only around 60–150 Hz but also near 350–400 Hz. A shallow, medium-to-wide bell cut there cleans things up while preserving the core (Mixed In Key). Basic EQ and compression moves are covered in our mixdown guide.
Breaking the bass down by frequency band makes it clear what to treat and where.
Frequency band | Main role | Common problem | Approach |
|---|---|---|---|
20–60 Hz | Sub fundamental | Inaudible on small speakers | Keep sub mono; add harmonics with saturation |
60–150 Hz | Low-end weight (clashes with kick) | Mud and masking | Separate with sidechain / dynamic EQ |
350–400 Hz | Low-mid buildup | Boxiness and mud | Shallow, wide bell cut |
Genre-Specific Bassline Tips
Once you have the basic workflow, knowing a few genre staples expands your options fast. Here are three common approaches.
House / EDM
Over a four-on-the-floor kick, sidechaining the bass so it ducks rhythmically creates that pumping, "breathing" low end. Sidechain is essential so kick and bass can share the same range (iZotope). Placing bass on the offbeats to play call-and-response with the kick is also effective.
Funk / Pop
Heavy use of sixteenth-note syncopation and tight, gap-driven riffs pushes the groove. Lines built around root and fifth with passing notes shine here (MusicRadar). Don't overfill — leaving space is the key to a funky feel.
Making programmed bass feel human
If you program in MIDI, identical velocities and dead-on timing sound robotic. Raising the velocity of accented notes and nudging phrases slightly off the grid creates a more live feel. Even placing the bass just behind the beat lowers the center of gravity for a calmer groove (Loopcloud).
Conclusion
Writing a bassline becomes approachable when you build the foundation first and add movement and character on top. Here are the key points:
- Step 1: Anchor root notes to the chords and mark each change on beat 1
- Step 2: Add movement with root, fifth, third and seventh chord tones plus passing notes
- Step 3: Lock to the kick and build groove with gaps and repeated riffs
- Step 4: Layer sub and main bass, and use saturation to translate on small speakers
- Mixing: Keep the low end mono and separate kick and bass with sidechain or EQ
Start with root playing and expand gradually into chord tones, rhythm and sound design. Put your bassline into a full track, release it, and listen back objectively to find your next improvement.