How to Choose and Process Drum Samples: Layering, Tuning, Phase
Choose and process drum samples that sound human: pick the right one-shots, tune kicks to the key, layer without phase issues, and use round robin and velocity.
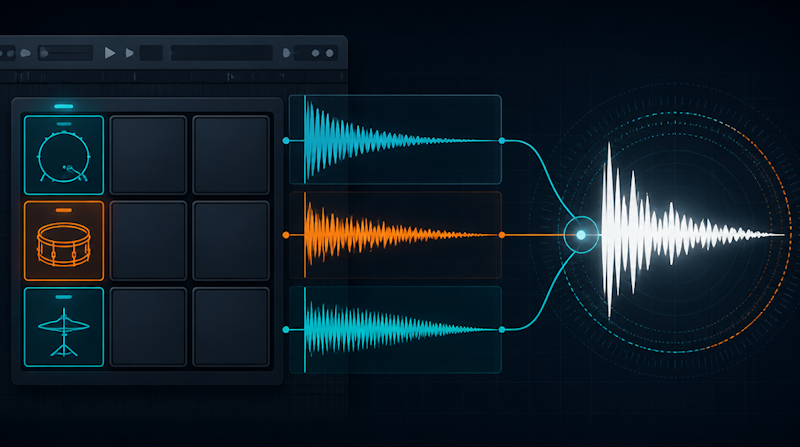
This guide covers how to choose and process drum samples for programmed beats in a DAW. When a beat built from one kick and one snare sounds robotic or thinner than the records you reference, the culprit is usually not the pattern. It is the samples themselves and how they are treated.
Below we walk through the whole chain in order: the criteria for picking samples that suit a track, tuning kicks to the key, layering, checking phase, adding variation with velocity and round robin, and finishing with transient shaping, saturation and parallel compression. Each step is grounded in official manuals such as Ableton Live's and in tutorials from established audio publications. If you want the pattern side of things first, our guide Beatmaking for Beginners: Drum Patterns and Groove covers it, and the two articles fit together.
What Are Drum Samples? Why Programmed Drums Sound Robotic
One-shots vs. loops
Drum samples come in two broad flavors: one-shots and loops. A one-shot is a single recorded hit (a kick, a snare, a hi-hat) that you trigger one MIDI note at a time. A loop is a recording of a drummer or a programmed beat that runs for several bars; drop it on the timeline at the right tempo and you have a groove.
Loops give you a vibe quickly, but it is hard to change the tone or timing of individual hits inside them. One-shots, on the other hand, let you decide exactly which sounds to combine, how hard each hit lands and how sounds are stacked, so every technique in this article applies to them. If your goal is an original beat, a practical rule is to build the core of the kit from one-shots and use loops as a secondary layer for texture.
The real cause of "robotic" drums: identical repeats
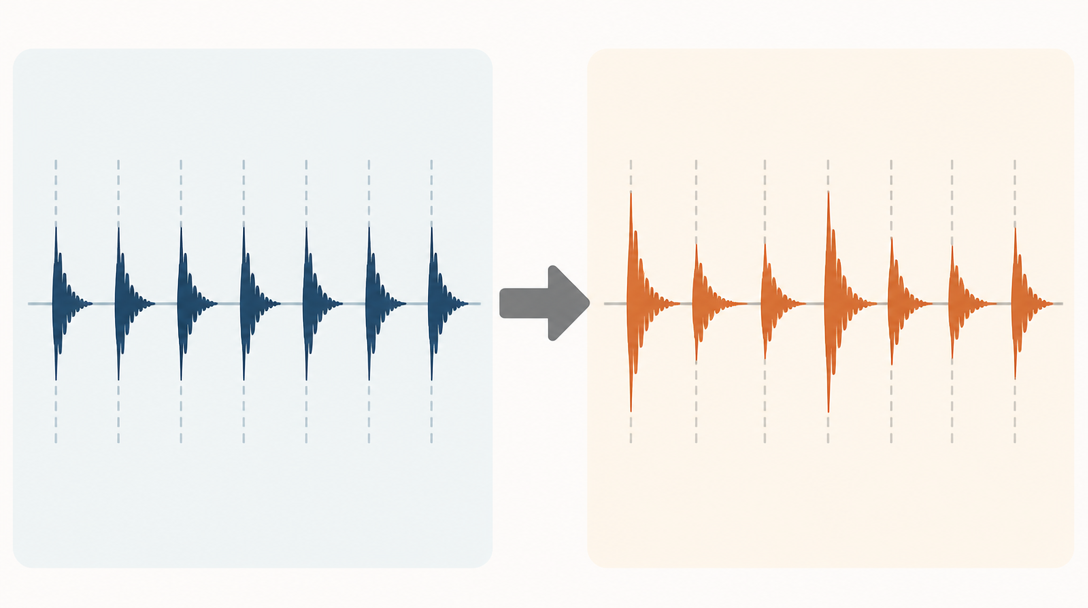
The most common reason programmed drums sound unnatural is that the exact same sample fires again and again at the same level. This is known as the machine-gun effect. Soundbridge's guide to round-robin sampling describes it as tight repetitions of the same sample removing any illusion of a real performance.
A real drummer never hits a snare the same way twice: the force, the spot on the head and the ring all shift slightly with every stroke. To recreate that in a DAW you need to combine velocity, round robin (cycling through several samples) and careful layering so that every hit is a little different from the last.
The drum sample processing workflow
This article follows the order below. Each step makes the next one work better, so the order itself matters.
- Choose: pick one-shots that suit the genre, tempo and license terms of your track
- Tune: match the pitch of kicks and toms to the key of the song
- Layer: fill missing frequency ranges with additional samples
- Check phase: make sure the layers are not cancelling each other out
- Add variation: use velocity and round robin to break up repetition
- Shape the tone: finish with transients, saturation, compression and reverb
How to Choose Drum Samples: Four Criteria for Sounds That Fit the Track
Choose by length (decay) to suit the genre and tempo
Before you think about tone, check how long the sample rings (its decay). A kick with a long tail in a fast track will still be sounding when the next kick arrives, and the low end turns to mud. A very short kick in a slow track leaves gaps between the beats and makes the groove feel empty.
Do not judge samples in isolation. Audition them in a pattern at the actual tempo of the song, with the bassline playing. You can always shorten a tail later with an amp envelope or a transient shaper, but stretching a short sound so that it still sounds natural is much harder. When in doubt, pick the slightly longer sample and trim it.
Pick dry samples and add space later
Sample packs contain "wet" sounds that already include room ambience or reverb, and "dry" sounds with very little reflection. Wet sounds are impressive on their own, but when you mix samples that were recorded in different spaces, the kick and snare can end up sounding as if they live in different rooms.
When you are building a kit from several sources, favor dry samples and add one shared reverb at the end. The result sounds like one coherent kit. We cover how to set up that shared space in the final section, "Put everything in the same space with reverb."
Check audio quality and file format
If you plan to process samples, choose uncompressed formats such as WAV or AIFF rather than MP3. Heavy pitch shifting or saturation tends to expose the information lost to lossy compression and any artifacts it introduced.
Also check for silence at the start of each one-shot. If a sample has a gap before the transient, it will sound late even when the MIDI note sits exactly on the grid, and the groove will drag. Trim the sample start in your sampler or edit the waveform so every hit begins right at the transient.
Check the license terms
Before using any drum sample in a release, read the terms of the pack or the site you downloaded it from. "Royalty-free" does not always mean anything goes: redistribution of the raw samples is usually forbidden, and some free libraries require attribution. Our article Sampling and Loop Copyright: What Royalty-Free Really Means explains the difference between royalty-free and copyright-free and how to read the terms of the major services.
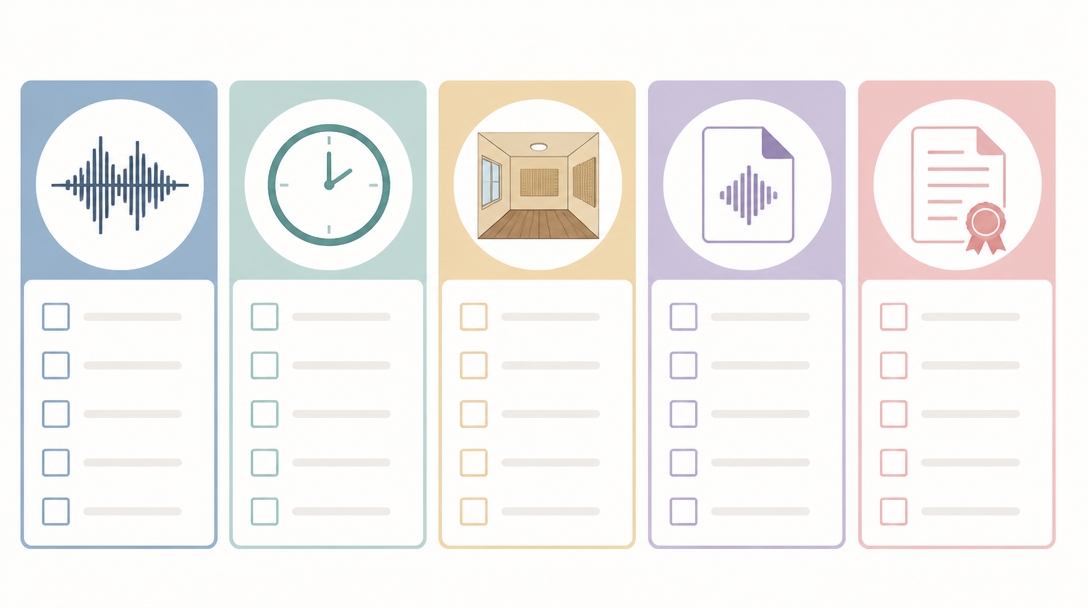
What to check | What to look for | If it does not fit |
|---|---|---|
Length (decay) | At the song's tempo, does the tail overlap and muddy the next hit? | Shorten the tail with an envelope or transient shaper |
Ambience (dry/wet) | Does each sample carry a different room sound? | Swap in dry samples and use one shared reverb |
Pitch | Does the kick or tom pitch clash with the key? | Transpose in the sampler (see next section) |
File format | Is it an uncompressed format such as WAV or AIFF? | Find an uncompressed version |
Leading silence | Is there a gap before the transient? | Adjust the sample start point |
License | Commercial use, distribution and redistribution terms | Do not use samples whose terms do not fit |
How to Tune Drum Samples: Matching the Kick and Bass to the Key
Why drums need tuning at all
Kicks and toms are often thought of as unpitched, but the body of the sound has a clear pitch. Sonarworks' guide to layered drum samples notes that the tuning of each drum, especially the snare and toms, should relate to the key of the song, and that badly tuned samples can make a track sound dissonant or confusing.
The kick shares the low end with the bass, so when the kick's pitch fights the bass notes you get beating, or certain notes suddenly swell in the low end. A kick that "just doesn't sit right" during sample selection can often be rescued simply by tuning it.
Find the fundamental and match it to the key
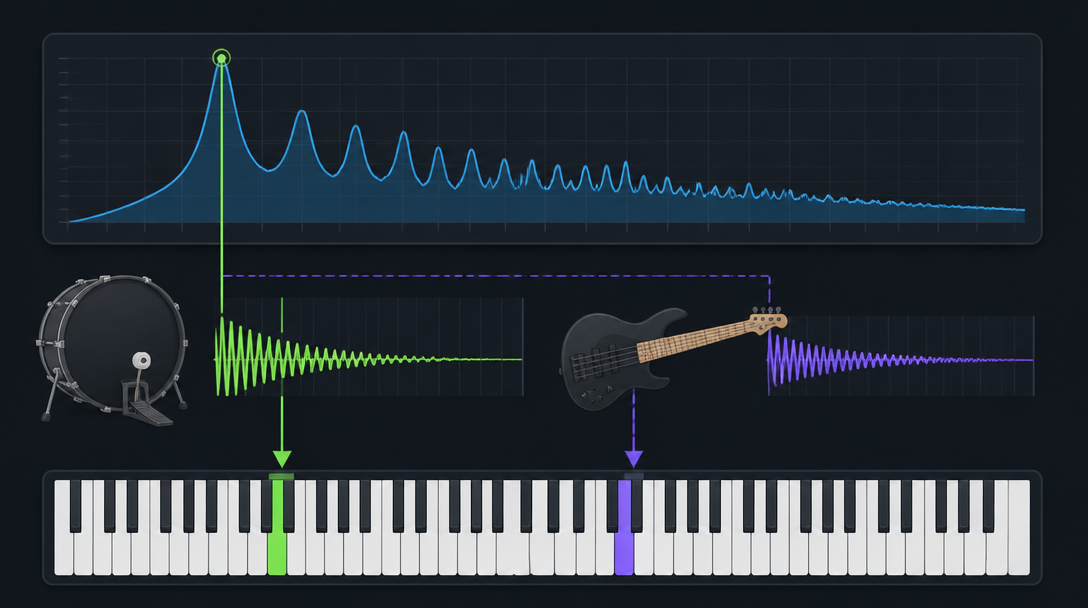
The first step is to find the sample's fundamental: the lowest big peak in its spectrum. iZotope's guide to tuning drum samples recommends identifying the pitch with Melodyne's pitch detection or your DAW's spectrum analyzer, then transposing the sample to fit the key of the track.
The key is to move to the nearest suitable note rather than shifting a long way; the same article warns that drastic pitch shifts can introduce wonky artifacts. A simple process looks like this:
- Play the kick on its own and find the fundamental peak on a spectrum analyzer
- Work out which note that frequency is closest to
- Transpose the sample in semitones toward the nearest root note of the key or a chord tone
- Fine-tune in cents and check it against the bassline
Transpose up an octave to hear the pitch clearly
Low kick pitches are hard to judge by ear. Attack Magazine's tutorial on tuning kick, snare and tom samples suggests transposing the kick up one or two octaves, fine-tuning it there, and then transposing it back down. Because you are making the decision in a range where pitch is easy to hear, this works even without an analyzer.
The same tutorial recommends transposing the whole kit together and listening for the spot where it sits best in the track rather than tuning each drum in isolation. The aim is a sweet spot where the kick sounds in tune with the bass and their frequencies do not clash.
How pitching up or down changes the character
Tuning is not only about pitch matching; it also changes character. iZotope notes that pitching drums up gives a tighter, snappier groove, while pitching them down makes them sound fatter and more relaxed.
- Pitch up: the attack becomes more prominent and the drums cut through better at fast tempos
- Pitch down: more weight and girth, but the tail gets longer, so watch for low-end mud
- Automate a few cents of drift: adds the subtle pitch variation of a live player (per iZotope)
Layering Drum Samples: Filling the Gaps in Kicks and Snares
Layering means giving each sample a job
Layering means triggering several samples together to create one sound. Attack Magazine's guide to layering kick drum samples explains that stacking two or more samples lets you combine the best characteristics of each and build the ideal sound for your track.
The same guide stresses one point above all: EQ can't boost something that isn't there in the first place. If a kick has no real low end, boosting the lows with EQ will not create it. Missing ranges have to come from a sample that already contains them.
Deciding what each layer does
Start by naming what the current sound lacks. Attack Magazine suggests asking whether the kick is missing low-end boom, low-mid body and weight, or high-mid click. A typical division of labor looks like this:
Drum | Layer | What it provides | Example source |
|---|---|---|---|
Kick | Low layer | Weight and sub energy | A clean kick with a long tail, a sine-based kick |
Mid layer | Body and punch | An acoustic kick | |
Attack layer | Definition and cut | A short, clicky kick | |
Snare | Body | Tone and pitch | A tight snare |
Top | Width and high-end snap | A clap or a brighter snare |
Use EQ to separate the layers
Stack samples without any EQ and the same frequencies double up and turn muddy. In Sonarworks' example of adding low end to a bright kick, the original kick gets a high-pass filter to remove its lows, while the added sample gets a low-pass filter so only its low end remains.
- Low layer: low-pass to remove the mids and highs, keeping only the bottom
- Attack layer: high-pass to remove the lows, keeping only the click
- Mid layer: trim both ends gently so it does not overlap the other layers
For the basics of EQ, see Mixdown Basics: Using EQ and Compression Correctly.
Stacking layers on a single pad in your DAW
Programming is much easier when a layered sound plays from a single MIDI note. Ableton Live's reference manual on Drum Racks explains that if you set the same Receive note for multiple chains, that note's pad will trigger them all.
According to Sound On Sound's "Live 12: Drum Racks Revisited", you can create a layer simply by holding Cmd (Mac) or Ctrl (PC) while dragging a second, third or fourth sample onto the same pad. The article also suggests offsetting layers by a few milliseconds or adding LFO modulation to avoid a stiff, static result.
Checking Phase and Polarity: Why Layered Drums Can Sound Thin
What phase cancellation is
If stacking samples makes the sound thinner or takes away low end, suspect phase cancellation. The phase section of Attack Magazine's kick-layering guide describes it as parts of the layered waveforms being out of phase with each other and effectively cancelling each other out.
Sonarworks adds that phase problems when layering cause comb filtering, a series of peaks and notches in the frequency response that makes sounds weak, and that a misalignment of only a few samples can be enough. Waveforms that look lined up may still be fighting, so always confirm with your ears and a polarity switch.
How to check with a polarity flip
The quickest test is the polarity invert switch found in most DAWs. Attack Magazine recommends lining up the transients first and then checking polarity.
- Zoom in and align the transients (the very start of each hit) of the layered samples
- Solo only the kick layers
- Invert the polarity of one layer
- Compare the two states and keep whichever sounds fuller in the low end
- If both sound thin, nudge one sample a few milliseconds earlier or later and listen again
In Ableton Live, as the audio effect reference describes, the stock Utility device has separate controls that invert the phase of the left and right channels. Other DAWs typically offer the same function on the mixer channel or in a stock utility plug-in.
Polarity and phase are not the same thing
Many DAWs label the polarity button "Phase Invert," but as Attack Magazine points out, polarity isn't quite the same as phase. Polarity flips the waveform upside down; phase describes a relationship created by timing.
So if flipping polarity does not fix the problem, timing is the cause. Move one sample in small steps and find the point where the low end sounds strongest. Low frequencies have long wavelengths, so kick layers are especially sensitive to small offsets and deserve the most care.
Velocity and Round Robin: Making Programmed Drums Sound Human
Add dynamics with velocity
The foundation of human-sounding drum programming is velocity variation. Ableton's manual explains that each chain in a rack has a velocity zone specifying the range of MIDI Note On velocities (1 to 127) that it responds to.
That means you can trigger a different sample depending on how hard a note is played: a soft snare for gentle hits and a harder, brighter snare for accents. Sound On Sound describes velocity layering as the longstanding method of adding realism and dynamic variation to otherwise static samples. For velocity and swing in the context of a whole groove, see the section on the three elements of groove in Beatmaking for Beginners.
Use round robin to avoid identical repeats
Round robin is a playback method that cycles through several variations of the same sound. It is the cure for the machine-gun effect on 16th-note hi-hats, snare rolls and any part where the same drum repeats quickly.
Sound On Sound's Live 12 article explains how to load multiple samples into Sampler's Zone view, click RR, and choose how the samples are iterated: Forward, Backward, Random, or Other (random, but never immediately repeating the same sample). It also describes an alternative: put Simpler in Slice mode and place the Random MIDI device in front of it so each new note picks a slice at random.
Use choke groups for natural hi-hats
On a real kit, closing the hi-hat pedal cuts off an open hat that is still ringing. In a DAW this is done with a choke group. Ableton's manual states that any chains in the same choke group will silence the others when triggered.
- Put the closed and open hi-hats in the same choke group
- When a closed hat follows an open hat, the open hat's tail stops naturally
- If you have a pedal hi-hat sample, add it to the same group
It is a small setting, but it stops hi-hat tails from piling up and gives the part the cut-off behavior of a real player.
Choosing between velocity and round robin
Technique | What changes | Best for |
|---|---|---|
Velocity (level only) | Loudness | Quick dynamics |
Velocity layers | A different sample depending on hit strength | Changing tone between ghost notes and accents |
Round robin | A different sample on every hit, even at the same strength | Hi-hat runs, snare rolls |
Choke group | How sounds stop | Open and closed hi-hats |
Processing Drum Samples: Transients, Saturation and Parallel Compression
Shape attack and sustain with a transient shaper
A transient is the short burst of energy at the start of a sound. iZotope's guide to transient shapers explains that a transient shaper shapes the attack and sustain of a sound, and that slightly increasing attack while reducing sustain emphasizes the onset of the drums while shortening them, so they sound extra punchy.
The same guide notes that defined transients sound closer while smoothed transients recede, so transient settings can also create depth in a mix. Waves' tips for shaping drum transients make the same point: the balance of attack and sustain energy determines how hard-hitting or how soft a sound is perceived to be.
- More attack: brings out the edge of kicks and snares so they do not get buried
- Less sustain: shortens tails and prevents mud at fast tempos
- Less attack: pushes percussion back so the main elements stand out
Add harmonics with saturation
Saturation emulates the distortion that happens when analog gear is driven hard. iZotope's explainer on audio saturation shows how it adds harmonics to the original signal: a 100 Hz tone with odd harmonics added gains energy at 300 Hz, 500 Hz and 700 Hz.
The article also notes that because part of saturation is compression, saturating a drum bus glues the drums together dynamically while the added harmonics glue them together tonally. Added harmonics can also help a kick's low end stay audible on small speakers. Push it too far, though, and the attack gets squashed, so add it gradually while listening in the context of the mix.
Add density with parallel compression
Parallel compression blends a heavily compressed copy of a signal with the uncompressed original. Attack Magazine's guide to parallel compression notes that it can be used on many sounds but is probably most popular on drums, and that it is sometimes called "New York compression" because New York engineers used it so widely.
As a starting point the guide suggests an attack as fast as possible, a medium release of about 300 ms and a ratio of around 2.5:1. Because the original transients stay intact while the compressed copy lifts the quieter detail, you get density that sounds more natural than heavy compression on the dry track. The setup is simple:
- Create a drum bus or a return (send) track
- Insert a compressor on it and compress hard
- Leave the original drums untouched and slowly raise the compressed track until it adds weight
Compressor basics are covered in Mixdown Basics, and sidechaining to make room between kick and bass is covered in How to Use Sidechain Compression.
Put everything in the same space with reverb
Finally, use a shared reverb so samples from different sources sound like one kit in one room. Ableton's Drum Rack has return chains: according to the manual, up to six chains of audio effects can be added there, fed by the send sliders in each drum chain.
- Set up one short room reverb and send every pad to it
- Send less from the kick so the low end stays clean
- Send more from the snare and toms to bind the kit together
A single shared space blends far more naturally than individual reverbs on every drum. Once the drums are finished and the track is mixed and mastered, you can release it to streaming stores, the way Daito's released tracks are distributed.
Summary
Here are the key points for choosing and processing drum samples.
- Choose: check decay against the tempo, prefer dry samples and uncompressed formats, and read the license
- Tune: find the fundamental and transpose a short distance to the nearest suitable note; tuning a kick an octave or two up makes it easier to hear
- Layer: give low, mid and attack layers separate jobs and separate them with EQ, because EQ cannot add what is not there
- Check phase: align transients, test with a polarity flip, and adjust timing if that does not help
- Make it human: break up repetition with velocity layers, round robin and choke groups, then finish with transient shaping, saturation, parallel compression and a shared reverb
Once the drum sounds are right, the same pattern can transform the feel of an entire track. You can hear finished examples in Daito's released music.