FL Studio Step Sequencer: How to Make Your First Beat (2026)
A beginner's guide to the FL Studio step sequencer: how the Channel Rack works, program kick, snare and hi-hats on the grid, and add groove with swing.
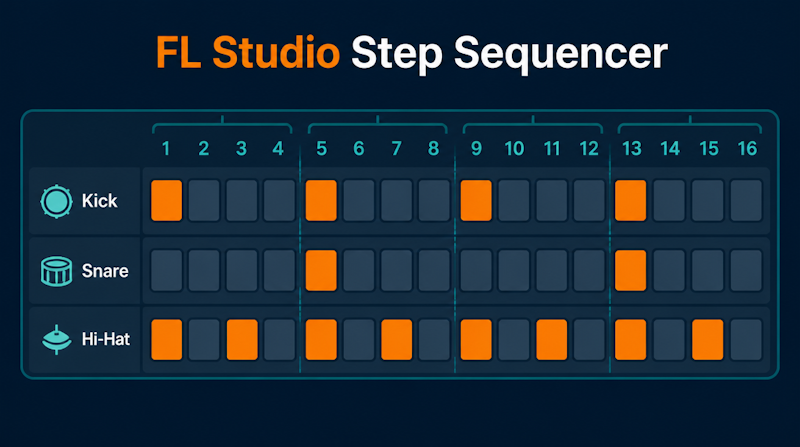
You want to make a beat in FL Studio, but you get stuck at the very first step: how does the step sequencer actually work? It is one of the most common walls for people starting out in music production. FL Studio is built around pattern-based sequencing, and you can build a drum loop just by clicking steps in the Channel Rack. This guide walks you through the basics of the step sequencer and Channel Rack, how to program a kick, snare and hi-hats, how to add groove with velocity and swing, and how to turn your pattern into a full track.
What Is FL Studio and Why Beginners Choose It
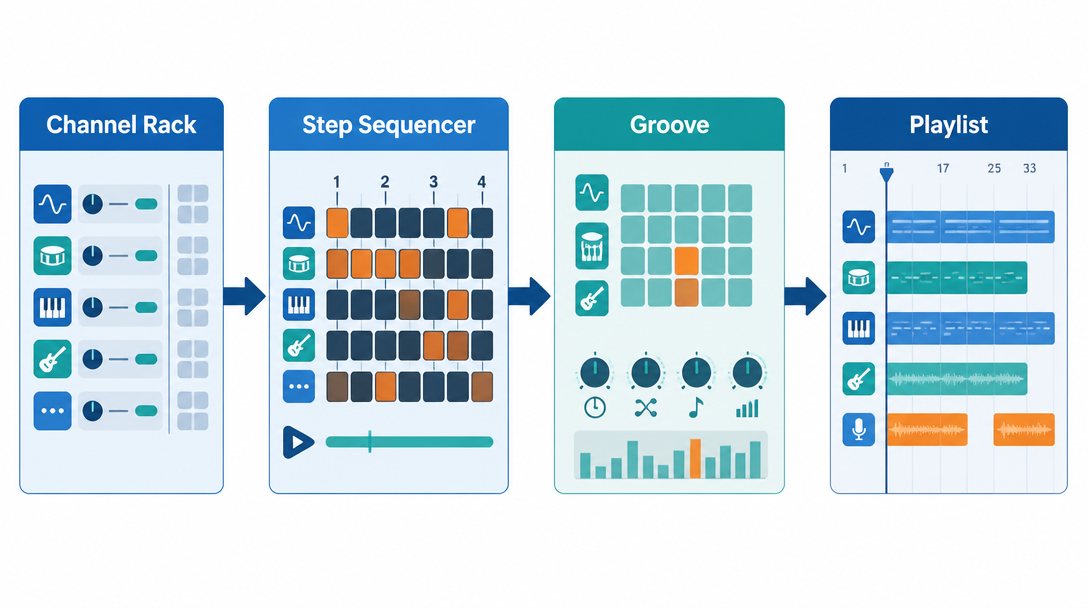
Before touching the grid, it helps to understand what FL Studio is and why it suits beginners. Knowing the character of the tool tells you where to click first.
FL Studio at a Glance
FL Studio is a DAW (digital audio workstation) developed by the Belgian company Image-Line. It first appeared in 1998 as "FruityLoops" and was later renamed FL Studio (Wikipedia: FL Studio). It runs on Windows, macOS, iOS and Android and is used across genres, especially hip-hop and EDM.
The Lifetime Free Updates Advantage
One of FL Studio's biggest selling points is its "Lifetime Free Updates" policy: once you buy your edition, you receive all future updates for free, for life (Image-Line). Because you never have to re-buy the software when new features arrive, the longer you use it the more value you get—one reason it is an easy first DAW to commit to. If you are still comparing options, our guide to choosing a DAW (Logic vs Ableton vs FL Studio) breaks down the differences between the big three.
The Pattern-Based Workflow
FL Studio uses a pattern-based workflow: you create small units called patterns and arrange them in the Playlist to build a song. Unlike most sequencers that lock each pattern to a single instrument, every FL Studio pattern shares the same set of instruments in the Channel Rack (FL Studio Manual: Channel Rack). In this guide you will first build one drum pattern in the step sequencer, then expand it into a track.
Step Sequencer and Channel Rack Basics
The stage for programming beats in FL Studio is the Channel Rack and the step sequencer inside it. Let's cover how these two relate and how to read the grid.
What the Channel Rack Is
The Channel Rack holds the instruments that create sound and the internal generators that control automation (FL Studio Manual). You load drum sounds such as kick, snare and hi-hat onto each channel and program rhythm with the steps along each row. By default, the F6 key toggles the Channel Rack on and off. Each channel row shows, from left to right, mute, pan, volume, the destination mixer track, the channel name button and the step buttons.
The Step Sequencer Grid (16 Steps = One Bar)
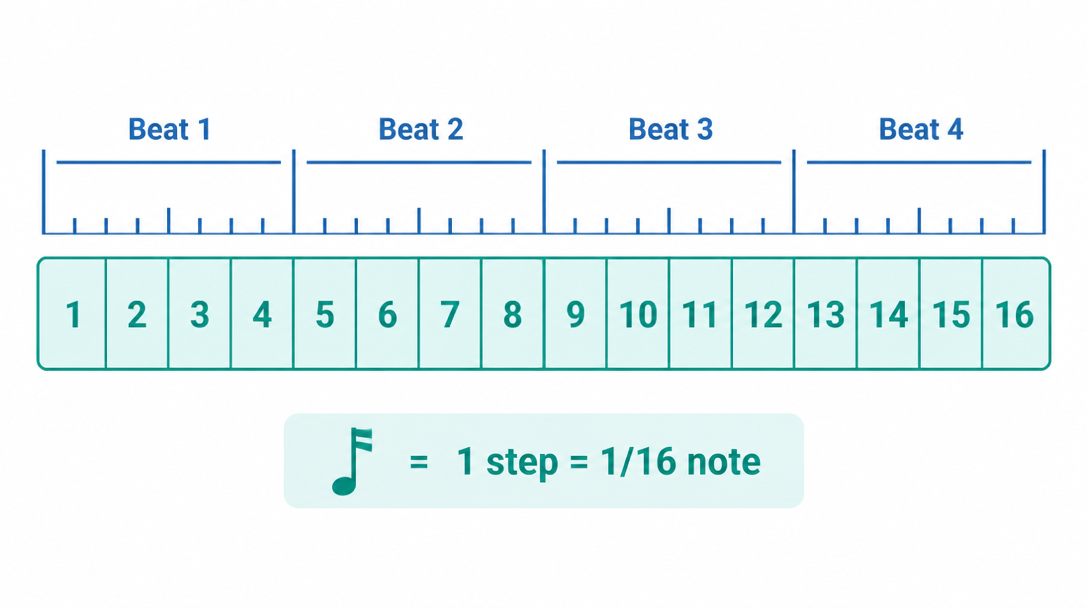
The step sequencer is a pattern-based grid sequencer, ideal for drum loops and simple melodies (FL Studio Manual). In standard 4/4 time the default layout is 16 steps = one bar, grouped in fours so each group is one beat. That means a single step equals one 16th note. Memorising how steps map to beats, as in the table below, makes programming far easier.
Beat | Steps | Length |
|---|---|---|
Beat 1 | 1, 2, 3, 4 | 16th notes |
Beat 2 | 5, 6, 7, 8 | 16th notes |
Beat 3 | 9, 10, 11, 12 | 16th notes |
Beat 4 | 13, 14, 15, 16 | 16th notes |
Left-Click to Add, Right-Click to Remove
The interaction is simple: left-click a step to turn it on (play the sound) and right-click to turn it off (remove it) (FL Studio Manual). Active steps light up, and on playback the channel's sound triggers at that moment. If you want to understand notes and MIDI first, our guide to MIDI basics for DAW users is a helpful primer.
Programming a Beat in the FL Studio Step Sequencer
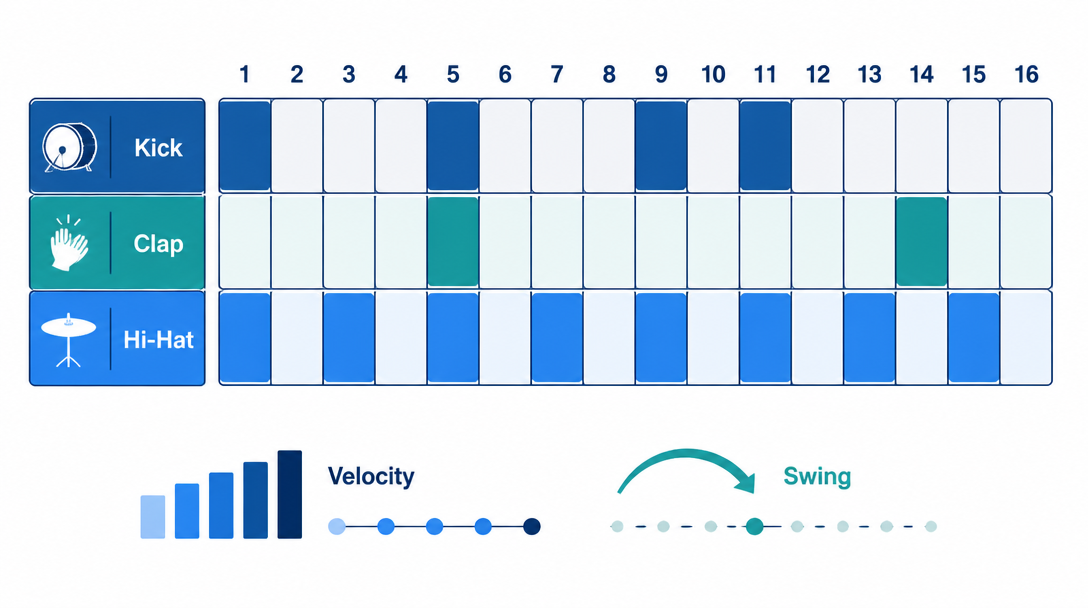
Now for the main event. Using the most basic beat as an example, we'll program kick, clap and hi-hats one layer at a time. Follow these three steps.
- Step 1: Lay the foundation with the kick
- Step 2: Place clap/snare on beats 2 and 4
- Step 3: Add the hi-hat pattern
Step 1: Lay the Foundation With the Kick
Start with the kick. For a simple hip-hop feel, place kicks on steps 1, 5, 9 and 11 for a grounded but slightly syncopated foundation (Audeobox: How to Use the Step Sequencer). For a four-on-the-floor house/EDM feel, place kicks evenly on steps 1, 5, 9 and 13 instead. Either way, always start on step 1.
Step 2: Place Clap/Snare on Beats 2 and 4
Next, put a snare or clap on steps 5 and 13, which fall on beats 2 and 4. This is the "backbeat," the most common rhythmic skeleton in popular music (Audeobox: How to Make Beats in FL Studio). With a kick for the foundation and a snare marking the clap position, these two layers alone already sound like a beat.
Step 3: Add the Hi-Hat Pattern
Finally, add hi-hats for finer motion. For eighth-note hats, place a closed hi-hat on the odd steps (1, 3, 5, 7, 9, 11, 13, 15) (Audeobox). Filling all 16 steps gives a busier 16th-note drive. Putting it together, the basic pattern looks like this.
Sound | Active steps | Role |
|---|---|---|
Kick | 1, 5, 9, 11 | Low-end foundation |
Clap / snare | 5, 13 | Backbeat (beats 2 & 4) |
Hi-hat (8th) | 1, 3, 5, 7, 9, 11, 13, 15 | Drive and motion |
How to Add Groove: Velocity, Swing and Ghost Notes
Evenly placed steps tend to sound mechanical. Here are three techniques to make the same pattern feel more like it was played by a human.
Change Velocity in the Graph Editor
Varying how hard each step hits (velocity) instantly removes monotony. In FL Studio, open the Graph Editor (shortcut Ctrl+K) to adjust note, velocity, release, fine pitch, Mod X/Mod Y and shift per step (FL Studio Manual: Graph Editor). Simply softening the off-beat hi-hats, for example, creates accents and dynamics.
Loosen It Up With Swing
Swing (shuffle) is a parameter that decides how far notes are nudged off the grid, creating a timing difference between odd and even steps (FL Studio Manual). Groove comes from a combination of timing variation, velocity variation and rhythmic structure, and the further you push notes off the grid the more "swung" the sequence becomes (iZotope: Swing and Syncopation). Even a gentle 52–53% swing can bring a loop to life. Start subtle and dial it in to taste.
Use Rests and Ghost Notes to Breathe
Beginners tend to cram in notes, but the gaps you leave are the groove's breath. Instead of filling every step, deliberately leave some empty or add quiet ghost notes so the kick and snare can step forward. How you balance levels here ties directly into mixing; our intro to mixing with EQ and compression is a good companion read.
Turning Patterns Into a Track: The Playlist
Once you have one drum pattern, you multiply and arrange it into a song. This is where FL Studio's pattern-based workflow shines.
Clone Patterns to Create Variations
The Channel Rack's right-click menu includes helpers such as cloning a channel and "Fill each 2 / 4 / 8 steps" to auto-place steps at fixed intervals (FL Studio Manual: Step Sequencer Menu). Duplicate your base pattern and add fills to build variations you can bring in and out.
Arrange in the Playlist
Placing your patterns in the Playlist builds the full song structure. Lay out sections—intro, verse, chorus, break—and add or remove patterns to shape the arrangement. Repeating one idea with small changes is the backbone of popular music, and adding bass and chords quickly makes it feel like a song.
Add Bass and Chords
With the drums in place, add bass and chords in the Piano Roll. Locking the kick and bass timing together gives the low end a unified feel. For taming the low end with sidechaining, see our guide to sidechain compression, and for picking a synth, our plugin synth comparison. Finished tracks can be released worldwide through distribution services. Music produced and distributed by Daito Iwasaki—a gymnast who became an artist—can be heard on the Daito artist page.
Common Beginner Mistakes and How to Fix Them
Finally, here are the problems people hit most often when they first start programming in the step sequencer, and how to solve them. Once you know the cause, each is a quick fix.
No Sound? Check Mixer Routing and Volume
If a step is placed but you hear nothing, check whether the channel is muted, the volume is turned down, or the mixer destination and its level. Each Channel Rack row has mute, pan, volume and mixer-send controls on the left (FL Studio Manual). Your monitoring setup also matters; our guide to choosing studio monitors can help.
Setting Tempo and Time Signature
Set the speed with the tempo (BPM) in the transport bar—roughly 80–95 for hip-hop and 120–128 for house. To change the time signature or use more than 16 steps per bar, adjust the step-count setting in the step sequencer. When starting out, it is best to stay in 4/4 with 16 steps until you are comfortable.
Handy Features and Shortcuts
Learning a few shortcuts and helpers makes programming much smoother. Here are the key ones.
Action | How |
|---|---|
Toggle Channel Rack | F6 |
Open Graph Editor | Ctrl+K |
Add / remove a step | Left-click / right-click |
Auto-fill steps at intervals | Right-click menu: Fill each 2 / 4 / 8 steps |
Convert steps to piano roll | Right-click menu conversion commands |
Phrases programmed in the step sequencer can be converted into Piano Roll notes from the right-click menu for finer editing (FL Studio Manual: Step Sequencer Menu). As you grow more comfortable, move back and forth between the step sequencer and Piano Roll to widen your expressive range.
Summary
The FL Studio step sequencer is the ideal beginner environment for programming beats with nothing but clicks. Here are the key takeaways.
- Load sounds into the Channel Rack; left-click to add and right-click to remove steps (16 steps = one bar)
- Start from the basic pattern: kick (1, 5, 9, 11) + snare (5, 13) + hi-hat (odd steps)
- Create groove with velocity, swing and rests
- Clone patterns, arrange them in the Playlist, and add bass and chords to make a track
- If there's no sound, check mute, volume and mixer routing
The fastest way to improve is to program the basic pattern above as-is, then slowly experiment with velocity and swing.