How to Choose Studio Monitor Speakers for Accurate Home Mixing
How to choose studio monitor speakers: differences from hi-fi speakers, nearfield basics, woofer size for your room, and placement tips for accurate mixing.
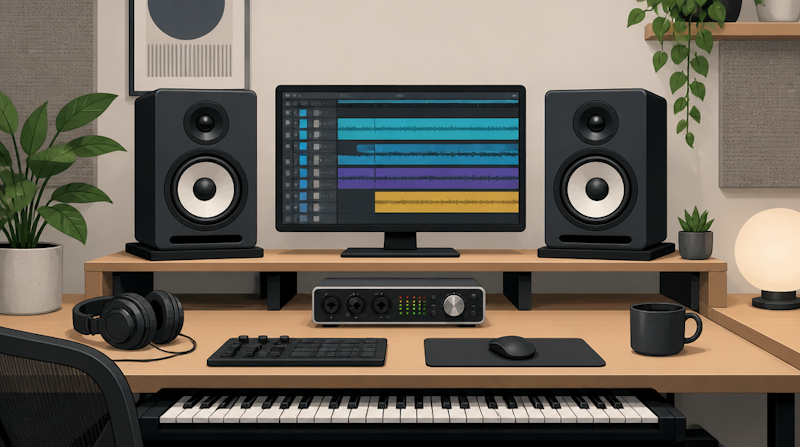
Studio monitor speakers are specialized speakers built to let you hear your music "accurately" during production. The quality of your home mix depends heavily on which studio monitors you choose. This guide breaks down everything from how monitors differ from consumer speakers, to matching woofer size to your room, connecting them to your gear, and positioning them for precise listening.
What Are Studio Monitor Speakers?
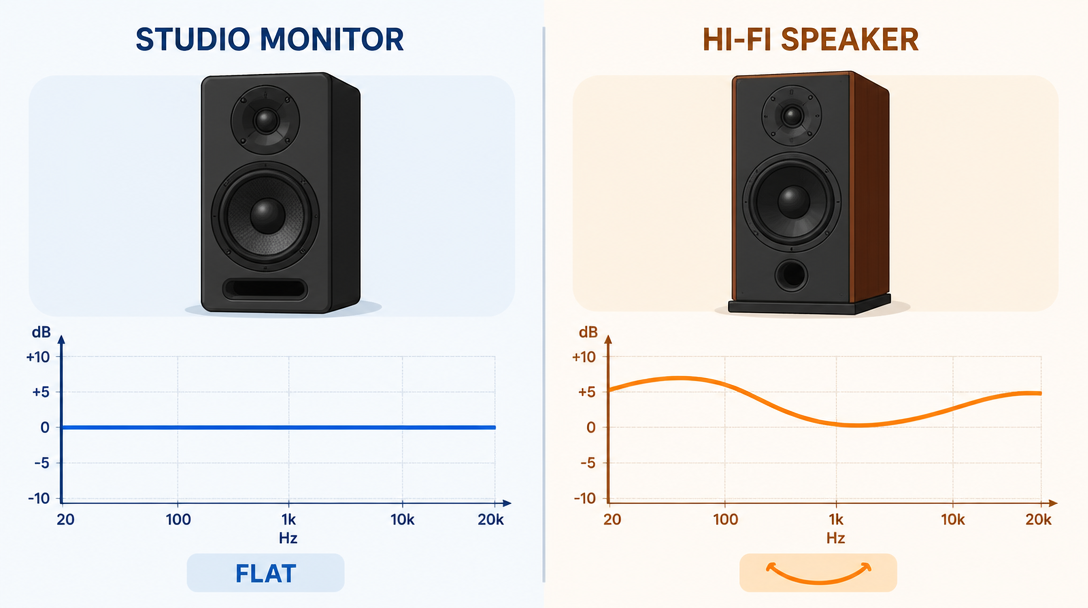
The first thing to understand is that studio monitors are not designed to make music sound "pleasant." They are tools for producers to accurately judge the balance and flaws of a recording, which is a fundamentally different goal from hi-fi listening.
How They Differ From Consumer Speakers
Hi-fi speakers are intentionally voiced to boost the lows and highs so music sounds appealing. Studio monitors, by contrast, aim to reproduce the recorded sound as it is, without emphasizing any frequency band. As Andertons explains, monitors deliver a "flat, precise sound for nearfield use" designed to reveal imperfections in your mix.
What a Flat Frequency Res ponse Means
The heart of a studio monitor is its flat frequency response. Because it doesn't color the sound, you can objectively judge which bands are excessive and which are lacking. According to Sound on Sound's analysis, monitors are engineered toward a "neutral average" so that your productions translate without breaking down across any playback system.
Why Home Mixing Needs Monitors
If you mix on hi-fi or consumer speakers, the result may sound good in that environment but very different elsewhere. Using studio monitors improves the consistency of your mixes and reduces second-guessing during production. For the actual mixing workflow, see our guide to using EQ and compressors.
Nearfield Monitor Basics
Almost all studio monitors used in a home environment fall into the "nearfield monitor" category. Let's clarify what this term means.
What Is a Nearfield Monitor?
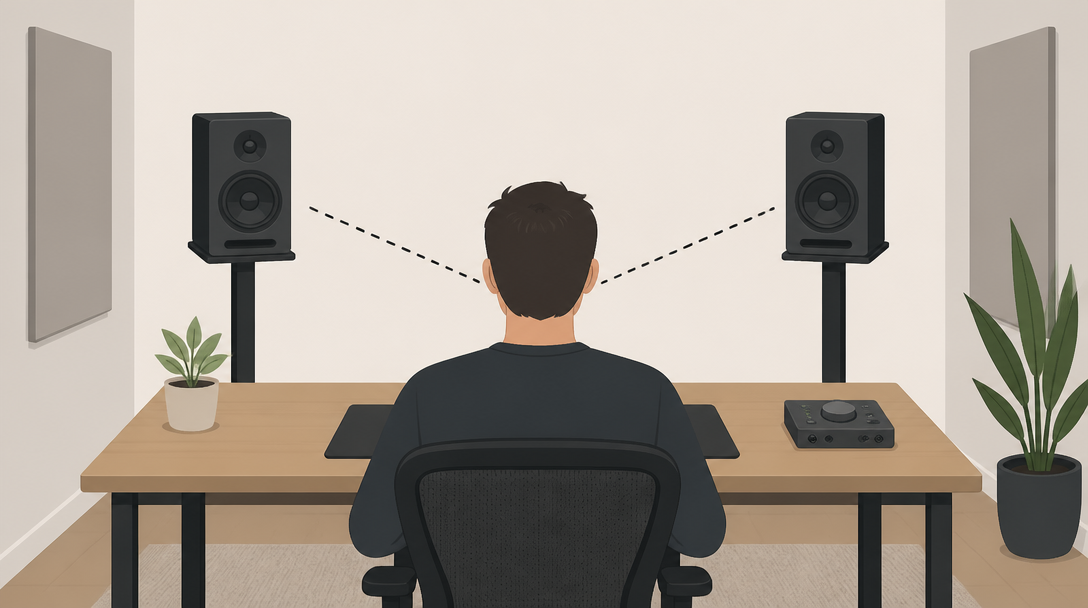
A nearfield monitor is designed on the assumption that the distance between the speaker and your ears is roughly 0.8 to 1.5 meters. Because the distance is short, reflections from walls and ceilings have relatively less impact, making them easier to use in homes without treated acoustics. As the Shimamura guide notes, nearfield monitors are the mainstream choice in residential settings.
The Difference From Farfield Monitors
By contrast, large, high-output speakers built into the walls of professional studios are called "farfield monitors." Hi-fi speakers are also designed to be heard from a distance and are unsuited to close-range mixing in a small room. For home production, the basic step is to get a single pair of nearfield monitors first.
Powered (Active) Types Dominate
For desktop music production, "powered (active)" speakers with a built-in amplifier are the mainstream. Because the manufacturer has integrated an amp optimized for the speaker, you don't need to worry about amp matching and the connection is simple. Compared with "passive" speakers that require a separate amplifier, they are much easier to adopt as a first pair.
Choosing Woofer Size by Room Size
The most important factor when choosing monitors is the size of the woofer (the low-frequency driver). Rather than "more expensive is better," matching the size to your room and listening distance is the key to avoiding failure.
Rough Guidelines by Size
Nearfield monitor woofers are generally 3 to 8 inches. Putting large drivers into a small room causes excessive bass, which actually makes accurate judgment harder. Below are guidelines for room size and woofer size.
Woofer Size | Intended Room / Setup | Characteristics |
|---|---|---|
3-4 inch | Desk area / small room | Easy to place, modest bass. Good for desktop production |
5 inch | Medium home room | The home DTM standard. Good balance of bass and placement |
6.5-8 inch | Large room / treated room | Ample low-end reproduction. Needs volume and space |
Sound & Recording Magazine also recommends choosing based on the compatibility of size and room.
The Relationship With Listening Distance
Woofer size is linked to listening distance. If your ears are about 0.8 to 1 meter away, a 5-inch or smaller model reproduces bass adequately, while a room with more distance opens up 6.5-inch and larger options. Choosing a size that fits your room leads to a more accurate mix than forcing a large driver into a small space.
Do You Need a Subwoofer?
For bass-heavy genres, you can later add a subwoofer to reinforce the low end. However, setting up your main nearfield monitors and treating the room comes first. Since a subwoofer requires crossover and level adjustment after installation, beginners don't need to rush into one.
Judging by Sound Quality and Specs
Catalog specs contain clues for judging a monitor's accuracy. Understanding what the numbers mean lets you choose without being swayed by price alone. Be sure to check the following items in particular.
- Frequency response (the range of lows to highs it can reproduce)
- The +/-dB tolerance (a guarantee of flatness)
- Woofer size and rated output
- Input connector types (XLR, TRS, RCA)
- Bass-reflex port position (front or rear)
Frequency Response and Range
The frequency response (e.g., 50Hz-20kHz) shows how far into the lows and highs a speaker can reproduce. Small nearfield monitors may not fully reproduce the deepest lows, but for home mixing it's more practical to choose a model with a manageable range than to chase extreme sub-bass.
What the +/-dB Figure Reveals
The tolerance that follows the frequency response, such as "+/-3dB," is a guarantee of flatness. The smaller this number, the more honest and uncolored the speaker. Brands that aim to make consumer sound "pleasant" often don't publish this figure. Whether the spec sheet shows evidence of flatness is a useful selection guide.
Cabinet and Port Design
The cabinet material and the shape of the bass-reflex port that reinforces the low end also affect sound. Models with a front-firing port tend to keep bass from becoming muddy even when placed close to a wall, making them easier to use in home setups where speakers often sit near walls.
Check Connectors and Gear Compatibility
Studio monitors only reach their full potential when properly connected to an audio interface. Confirm how they connect to your existing gear before buying.
Balanced vs. Unbalanced Connections
In professional settings, noise-resistant "balanced connections" (XLR or TRS phone) are standard. Even at home, balanced connections reduce noise when running cables over distance. Check whether the monitor has XLR or TRS inputs; some models only have RCA (unbalanced) inputs.
Connecting to an Audio Interface
The monitor's input jacks must match your audio interface's output jacks. Many audio interfaces feature monitor outputs (TRS phone). For details on choosing gear, see our guide to audio interfaces. For DAW setup, also see our DAW selection guide.
Match Them as a Left-Right Pair
To achieve an accurate stereo image, studio monitors should be matched as a pair of the same model for left and right. Even for models sold individually, always get two units under the same conditions. If the left and right characteristics diverge, your judgment of imaging and panning goes off.
Placement Techniques for Accurate Monitoring
No matter how good your monitors are, poor placement prevents them from performing. Master the placement basics that determine home mixing accuracy.
The Equilateral Triangle and Tweeter Height
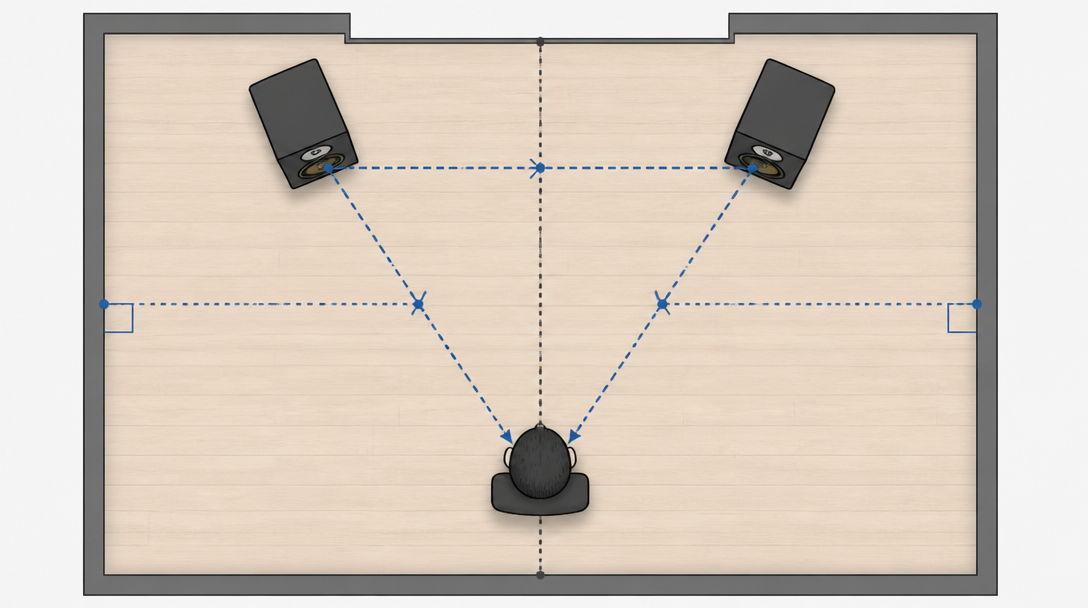
The Yamaha placement guide recommends forming an equilateral (isosceles) triangle with the two speakers and your listening position. Setting the tweeters (which reproduce the highs) at the same height as your ears enables more accurate monitoring.
Distance From Walls and Reflection Control
Placing speakers too close to walls or corners over-emphasizes the bass. Yamaha's guide recommends keeping distance from rear and side walls, and Genelec's placement notes also advise keeping distance from walls to avoid standing waves and arranging the setup symmetrically. In a rectangular room, facing the speakers toward the short wall pushes the front wall farther away, helping reduce reflections.
Treating the Room Acoustics
Placing absorption material at the "first reflection points," where sound from the speakers first bounces, improves monitoring accuracy. Specifically, the sides and rear of the speakers, plus behind the listening position, are the three effective spots. Keeping the distance between the left and right speakers and the walls symmetrical is also important for an accurate stereo image. A well-treated room directly supports the judgment accuracy discussed in our mastering guide.
Common Mistakes When Choosing Monitors
When choosing studio monitors, many people repeat the same mistakes. Knowing the typical pitfalls in advance helps you avoid wasted money and re-purchases.
Choosing by Specs or Price Alone
Numeric specs are important clues, but making a final decision on them alone is risky. Even with the same woofer size, cabinet design and tuning change how a speaker sounds. If possible, audition monitors at a store and play familiar reference tracks to check bass quantity and imaging. The Shimamura guide also warns that "more expensive is better" thinking leads to failure.
Ignoring the Room Environment
Even high-performance monitors can't shine if the room acoustics aren't treated. Bass in particular is strongly affected by the room, so as Genelec's placement notes show, placement mindful of standing waves and reflections must go hand in hand with absorption. Consider your installation space and acoustic treatment alongside the speaker choice.
Choosing Large Models Where You Can't Play Loud
Large-driver monitors only reach their potential at a certain volume. In apartments where you can't play loud, small models often sound better balanced at low volume, leading to more accurate judgment. Choose based on how loud you can realistically play in your environment. As Sound on Sound notes, nearfield monitors are designed for close listening in small rooms, so there's no need to force a large model.
Summary
Studio monitors are the foundation that supports the consistency and judgment accuracy of your home mixes. Here are the key selection points.
- Monitors reproduce sound accurately with a flat frequency response, a different goal from hi-fi speakers
- Nearfield monitors are the home standard; powered (active) types with a built-in amp are easiest to use
- Choose woofer size by room size and listening distance (5-inch is the standard for a medium room)
- Read evidence of flatness from specs like the +/-dB tolerance and frequency response
- Draw out full performance with the triangle layout, tweeter-height matching, wall distance, and absorption